LIFT SAFETY
An early issue of the I-CAR Advantage asks, “Does a Shop Need a Lift?” That article focused on the different types of lifting equipment and how to consider which type would be right for your repair facility. Most repair facilities use some type of lift. This article will focus on the safe use of lifting equipment.
The prospect of a falling vehicle is much too heavy to take lightly. Lack of training, operator error, being in a hurry, and neglected maintenance will cause lift-related accidents. Lift accidents result in serious consequences.
OWNER RESPONSIBILITIES
Owners must provide technicians with proper training before authorizing them to operate lifting equipment. If the owner does not feel comfortable delivering the training the lift manufacturer or lift service company may be employed. If a facility uses more than one type of lift, separate training must be delivered for each type. Technicians must know the maximum weight capacities, how the controls operate, proper vehicle spotting methods, lift safety features, rules for safe lifting, and good housekeeping procedures.
 There are excellent materials available to assist in training delivery. The owner’s manual for each lift contains safety and operating
instructions for each lift and it must be carefully reviewed by anyone before they operate the lift. The Automotive Lift Institute (ALI) provides a variety of safety materials related to automotive lifts. These materials are included with lifts conforming to the American National Standard governing lift Construction, Testing and Validation. The materials include the generic safety manual “Lifting it Right” and the Operation Inspection and Maintenance standard “ANSI/ALI ALOIM” manuals. Also available from ALI is a training video and a competency test for lift operators. These materials contain important information and provide checklists and verification forms that can be included in a facility’s lift safety, inspection, and maintenance programs. All training must be properly documented, per ANSI/ ALI ALOIM, and retained for future reference.
Owners should also ensure that all of the necessary safety labels and instruction postings are attached to the lift or located near the controls (see Figure 1). These materials include illustrated warning labels, and the ALI wall poster “Safety Tips.” These materials serve to reinforce safe lifting procedures. Worn, unreadable, or lost labels and instruction postings should be replaced immediately. For frame-engaging lifts, a copy of the ALI/LP “Vehicle Lifting Points – Quick Reference Guide” should be kept nearby. This manual provides vehicle maker specified lifting points for passenger cars, vans, and light trucks. Each annual
publication covers the most recent 20 years of domestic and imported vehicles.
TECHNICIAN RESPONSIBILITIES
 Technicians should maintain a constant awareness of the many hazards involved with lifting vehicles. Many preventive measures can be taken to minimize the chance of lift-related accidents. Be aware of what is going on in the area at all times and do not allow unqualified persons to enter the lifting area. This is especially important for customers who are likely unaware of the facility’s hazards.
Wear the appropriate personal protective equipment. Falling objects or debris is one of the hazards of working under elevated vehicles. Safety glasses should always be worn to protect your eyes when doing overhead work. A hard hat or bump cap may also be considered for protecting your head from the vehicle underbody.
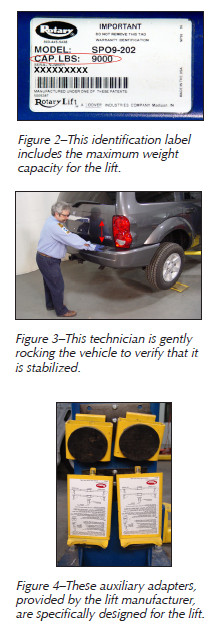
The maximum weight capacity for the lift should never be exceeded. The rated capacity should be located on the lift in an easily seen location and kept in good condition (see Figure 2). Always use the proper designated vehicle lifting points. If you aren’t sure, consult the vehicle service information or refer to the ALI “Vehicle Lifting Points – Quick Reference Guide,” to identify the correct lifting points for each vehicle. Check the lifting points and the lift adapters for damage or corrosion that may affect the support of the vehicle, and for wet, oily, or slick surfaces that may cause slippage.
Ensure that the vehicle is properly centered and balanced on the lift. Position the vehicle so that its center of gravity lies well within the area bounded by the supporting points of contact between the lift and the vehicle. If the center of gravity is not located well within this area, the vehicle will be subject to tipping. If the vehicle tips, it can slide off the lift. Do not rely on swing arm restraints to stop a vehicle from sliding off a lift. Their purpose is merely to maintain the position of unloaded swing arms. Observe all aspects of the vehicle when determining the center of gravity. Remove items located inside the vehicle that may affect the normal center of gravity. Before fully raising a vehicle to working position, raise it a short distance off the ground, gently rock it to verify that it is sufficiently stabilized (see Figure 3), and double-check that all supports are contacting the proper lifting points. Lower the vehicle to the ground and reposition if necessary. It is good practice to position high reach vehicle support stands under the vehicle to add stability, especially when lifting long wheelbase vehicles (long bed vans, pick ups or limousines) or short wheelbase vehicles (sports cars or super economy cars).
Take the necessary precautions while the vehicle is up on the lift. Ensure that the lift locking devices (latches) properly engage. Audible “clicks” as the vehicle is being raised indicate safe stopping points. When the desired height is reached, slowly lower the lift so the lift rests on the locking devices. Secondary support as described above may be necessary if the vehicle
is not raised high enough for the locking devices to engage or if the lift is not equipped with this type of device (such as with older air/oil in-ground lifts).
Also, take into account heavy parts that will be added or removed while the vehicle is on the lift. Use high reach vehicle support stands to help stabilize the vehicle for jobs that involve considerable displacement of weight or that shake the vehicle. Never lower vehicles onto vehicle support stands. If this is done, the stands may push the vehicle off the lift. Always adjust the stands to securely contact the vehicle after the lift is raised to the desired height. If a vehicle shows signs of falling, get out of the way and warn others immediately. Do not try to stabilize a falling vehicle!
When using drive-on lifts, make sure the wheels are properly chocked. Improper chocking is a common cause of many lift-related accidents. Make sure the lift front and rear stops are working properly and use the proper chocks provided with the lift. Wood blocks, bricks, or concrete blocks are not acceptable substitutes for chocks, contact pads, extenders, or any other type of vehicle support. Only use equipment provided by the lift manufacturer (see Figure 4).
When lowering the vehicle, make sure the area is clear of people, tools, and equipment. This includes toolboxes and oil drain pans that may catch under a vehicle and cause it to fall. Some types of lifts (parallelogram style) move fore and aft when being raised and lowered. Be sure that the space that the lift is moving into is completely clear. Be aware of the moving parts of the lift and ensure that these are clear also.
Quick Links
Contact Us